Excelでセルの読み上げ
2019.07.21
Excelでデータ入力後、元データと入力データの照合を行う時、セルの読み上げ機能を使うと耳に入ってくるデータと元データを比較するすることが出来ます。目で両方のデータを確認するのとどちらが良いか個人差があると思いますがお試しください。
Excel で読み上げコマンドを使用する
【開発】タブに【セルの読み上げ】グループを作成して【セルの読み上げ】を設置する。
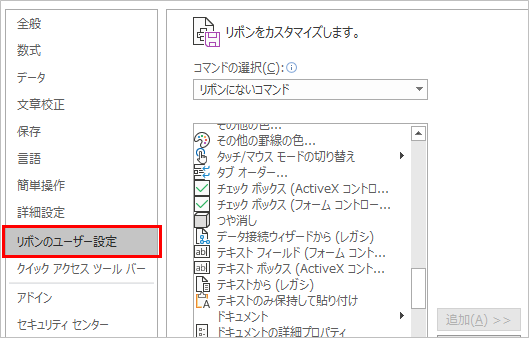
【ファイル】タブ→【オプション】→【リボンのユーザー設定】

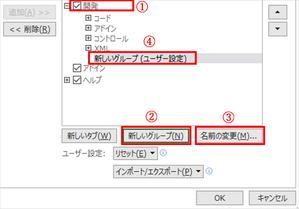
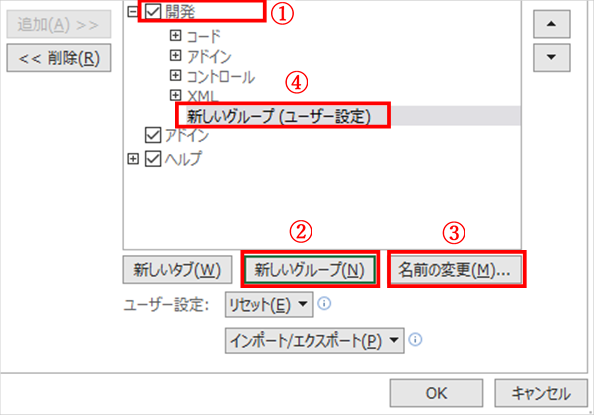
①【開発】タブを選択して、
②【新しいグループ(N)】をクリック
③【名前の変更(M)】をクリックする
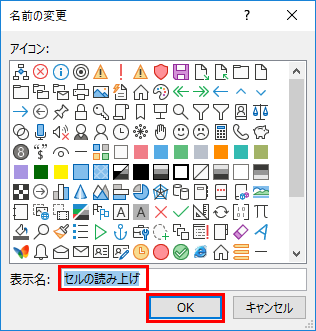
【名前の変更】ダイアログが表示されるので【表示名】を『セルの読み上げ』としました。
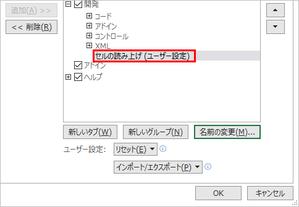
【グループ名】が『セルの読み上げ(ユーザー設定)』となりました。
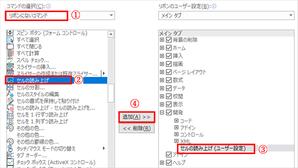
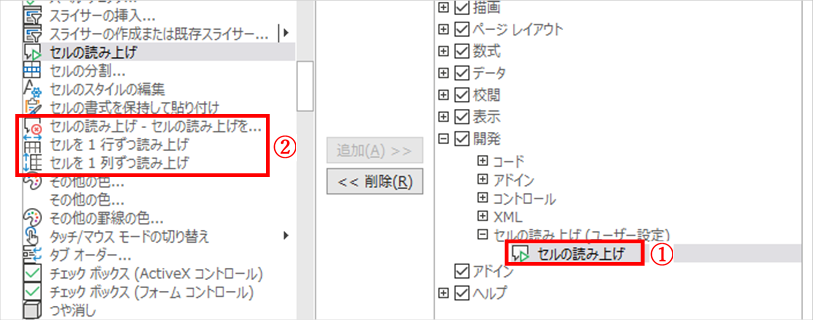
①【コマンドの選択】ボックスより【リボンにないコマンド】を選択して
②【セルの読み上げ】コマンドを選択します。
③【セルの読み上げ(ユーザー設定)】を選択し、
④【追加】ボタンをクリックします。
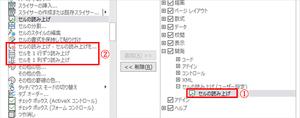
①【セルの読み上げ】が【セルの読み上げ(ユーザー設定)】グループに追加されました。
② 同様に【セルを1行ずつ読み上げ】【セルを1列ずつ読み上げ】【セルの読み上げ-セルの読み上げを停止】コマンドを追加します。
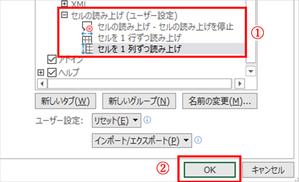
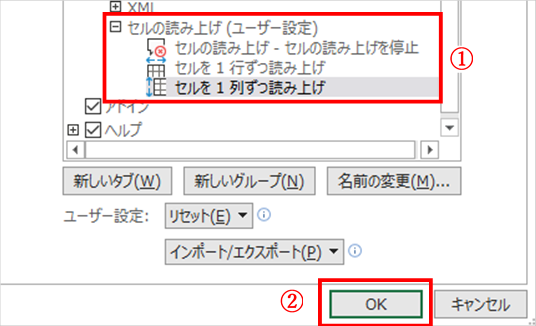
①【セルの読み上げ(ユーザー設定)】グループに4つのコマンドが追加されたことが確認できます。
②【OK】ボタンをクリックして完了です。
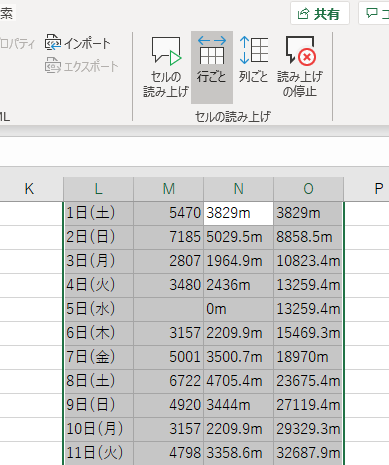
【開発】タブの【セルの読み上げ(ユーザー設定)】グループに設置されたコマンドを使用してセルの読み上げを実施します。
①表の中を選択します。
②【行ごと】か【列ごと】かどちらかを選択し
③【セルの読み上げ】をクリックするとセルの読み上げが開始されます。
④途中で停止するには【読み上げの停止】ボタンをクリックします。

Excel で読み上げコマンドを使用する
【開発】タブに【セルの読み上げ】グループを作成して【セルの読み上げ】を設置する。
【ファイル】タブ→【オプション】→【リボンのユーザー設定】
①【開発】タブを選択して、
②【新しいグループ(N)】をクリック
③【名前の変更(M)】をクリックする
【名前の変更】ダイアログが表示されるので【表示名】を『セルの読み上げ』としました。
【グループ名】が『セルの読み上げ(ユーザー設定)』となりました。

①【コマンドの選択】ボックスより【リボンにないコマンド】を選択して
②【セルの読み上げ】コマンドを選択します。
③【セルの読み上げ(ユーザー設定)】を選択し、
④【追加】ボタンをクリックします。

①【セルの読み上げ】が【セルの読み上げ(ユーザー設定)】グループに追加されました。
② 同様に【セルを1行ずつ読み上げ】【セルを1列ずつ読み上げ】【セルの読み上げ-セルの読み上げを停止】コマンドを追加します。
①【セルの読み上げ(ユーザー設定)】グループに4つのコマンドが追加されたことが確認できます。
②【OK】ボタンをクリックして完了です。
【開発】タブの【セルの読み上げ(ユーザー設定)】グループに設置されたコマンドを使用してセルの読み上げを実施します。
①表の中を選択します。
②【行ごと】か【列ごと】かどちらかを選択し
③【セルの読み上げ】をクリックするとセルの読み上げが開始されます。
④途中で停止するには【読み上げの停止】ボタンをクリックします。
 2019.07.21 11:31
|
2019.07.21 11:31
| 

3Dモデルの挿入
2019.07.11
Microsoft Office 365を使用していると自動でバージョンアップされるので新しい機能に気が付かないことがある。【3Dモデルの挿入】は2017/9に追加されドキュメントに動く3Dモデルを埋め込むことが可能です。
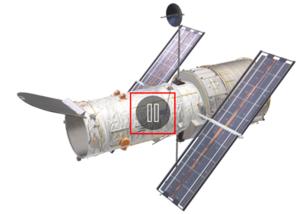
【挿入】→【3Dモデル】→【宇宙】→【ハッブル宇宙望遠鏡】で下の3Dが挿入された。
画像中央のボタンをドラッグすると縦横斜めに回転できる。
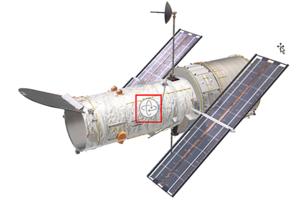
画像中央のボタンをクリックすると太陽光パネルとアンテナがアニメーションを開始する。
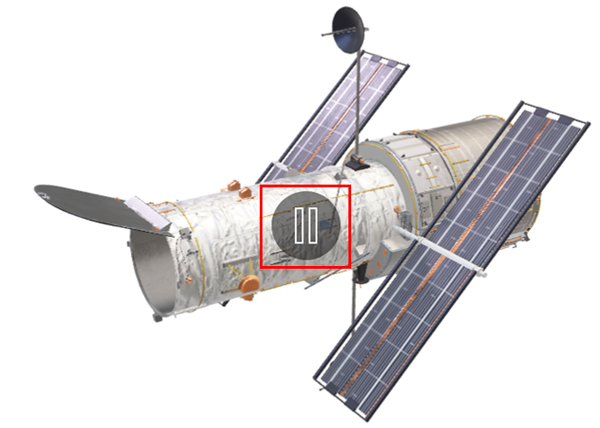
【挿入】→【3Dモデル】→【宇宙】→【ハッブル宇宙望遠鏡】で下の3Dが挿入された。
画像中央のボタンをドラッグすると縦横斜めに回転できる。
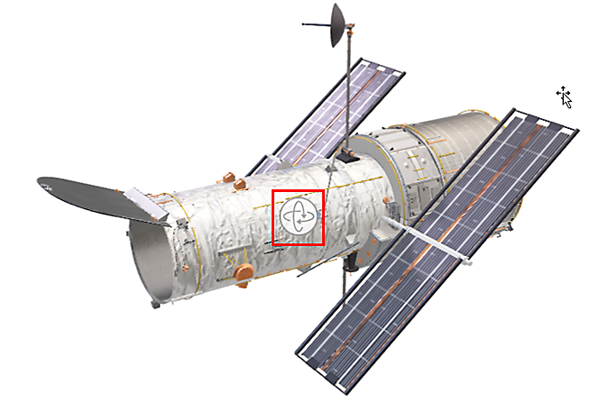
画像中央のボタンをクリックすると太陽光パネルとアンテナがアニメーションを開始する。
スクリーンショットの挿入
2019.07.11
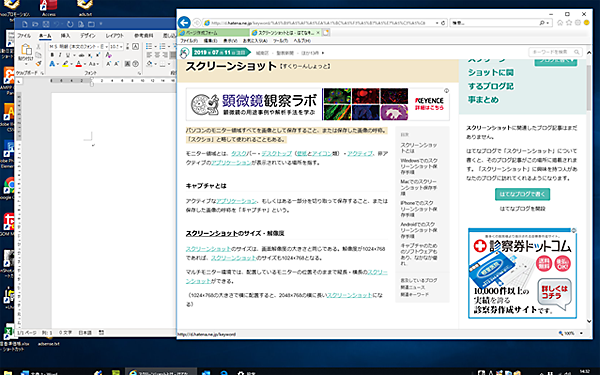
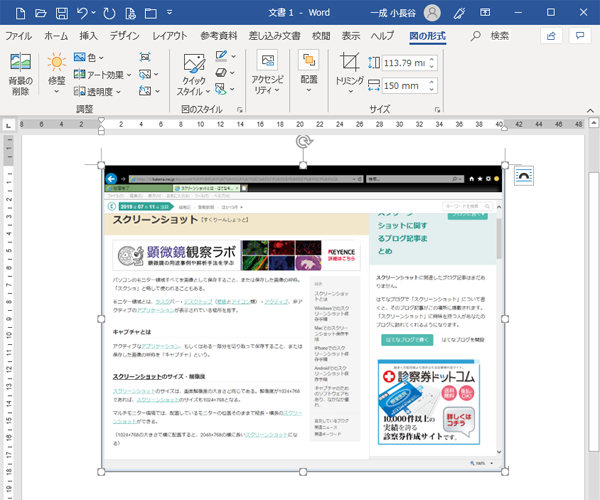
ウィンドウサイズのスクリーンショットを挿入します。
スクリーンショットするアプリをアクティブにし、不要なアプリは閉じるか最小化しておく。
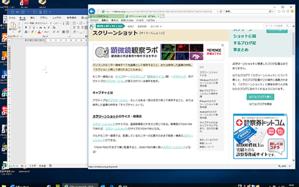
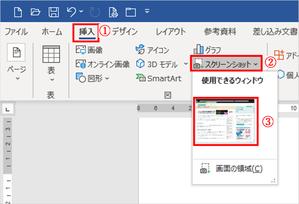
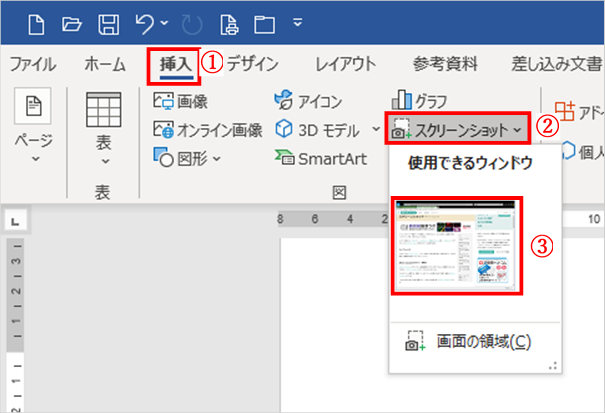
① Wordの【挿入】タブをクリック
②【スクリーンショット】をクリック
③ 【使用できるウィンドウ】に表示されている画像をクリック
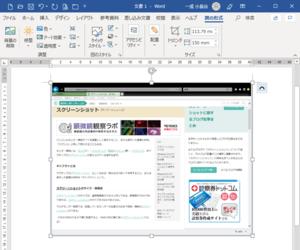
ウィンドウサイズのスクリーンショットが挿入されます。
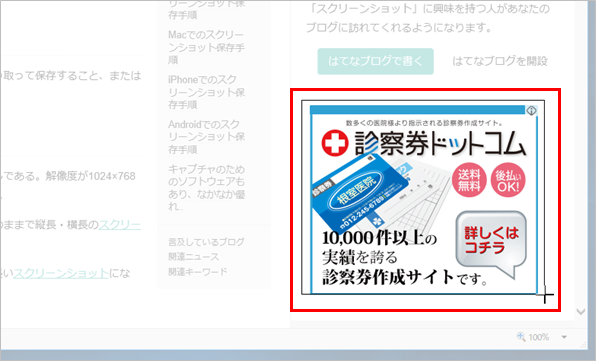
領域のスクリーンショットを挿入します
スクリーンショットするアプリをアクティブにし、不要なアプリは閉じるか最小化しておく。
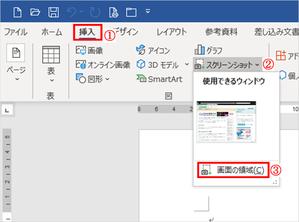
① Wordの【挿入】タブをクリック
②【スクリーンショット】をクリック
③【画像の領域】をクリック
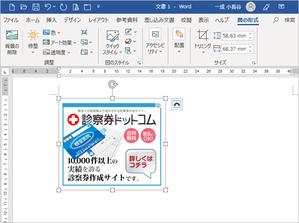
マウスでドラッグして画像の領域を選択します。
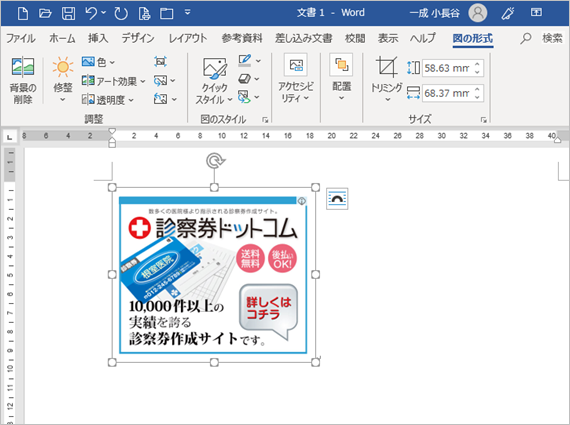
領域サイズのスクリーンショットが挿入されます。
※スクリーンショットとはパソコンのモニター領域すべてを画像として保存すること、または保存した画像の呼称。「スクショ」と略して使われることもある。
スクリーンショットするアプリをアクティブにし、不要なアプリは閉じるか最小化しておく。
① Wordの【挿入】タブをクリック
②【スクリーンショット】をクリック
③ 【使用できるウィンドウ】に表示されている画像をクリック
ウィンドウサイズのスクリーンショットが挿入されます。
領域のスクリーンショットを挿入します
スクリーンショットするアプリをアクティブにし、不要なアプリは閉じるか最小化しておく。
① Wordの【挿入】タブをクリック
②【スクリーンショット】をクリック
③【画像の領域】をクリック

マウスでドラッグして画像の領域を選択します。
領域サイズのスクリーンショットが挿入されます。
※スクリーンショットとはパソコンのモニター領域すべてを画像として保存すること、または保存した画像の呼称。「スクショ」と略して使われることもある。
CSSでぶら下げインデントの設定
2019.07.07
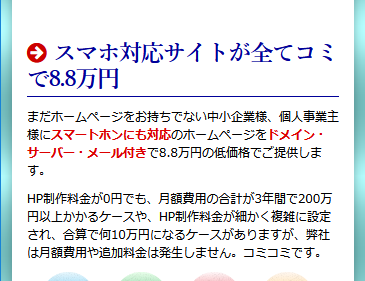 スクリーン幅の狭いスマホ表示では、文字列が折り返される事があります。下図のようにタイトルの行頭にアイコンを使用している場合は、1行目の文字の始まりと2行目の文字の始まりにズレが発生します。
 CSSで以下の設定をすると2行目以降の文字を1文字下げることができます。
h2{
text-indent: -1em;
padding-left: 1em;
}
半角数字を漢数字で表示する
2019.07.06
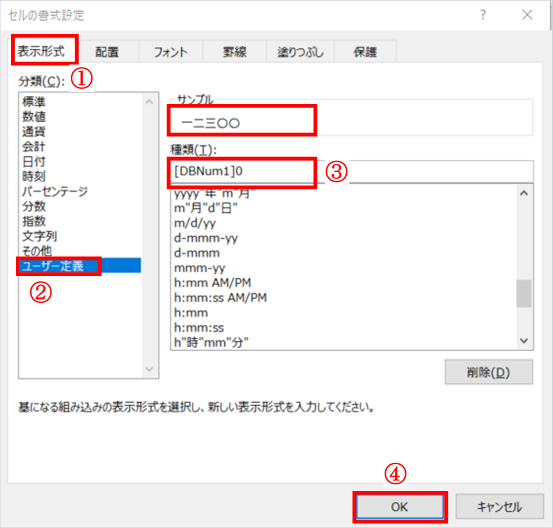
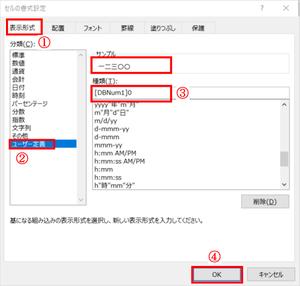
【表示形式の設定】により半角数字を漢数字で表示する方法です。
[DBNum1]0 ⇒ 一二三〇〇
[DBNum2]0 ⇒ 壱弐参〇〇
[DBNum1]G/標準 ⇒ 一万二千三百
[DBNum2]G/標準 ⇒ 壱萬弐阡参百
【セルの書式設定】-①【表示形式】タブ-[分類(C)】を②【ユーザー定義】をクリックして、③【種類(T)】を変更し④【OK】を押すと漢数字で表示されます。
[DBNum1]0 ⇒ 一二三〇〇
[DBNum2]0 ⇒ 壱弐参〇〇
[DBNum1]G/標準 ⇒ 一万二千三百
[DBNum2]G/標準 ⇒ 壱萬弐阡参百
【セルの書式設定】-①【表示形式】タブ-[分類(C)】を②【ユーザー定義】をクリックして、③【種類(T)】を変更し④【OK】を押すと漢数字で表示されます。